Why Spot Traders Still Need Stop Losses

Many traders believe spot positions don’t need stop losses. After all, there’s no liquidation… right? That mindset is exactly how profitable trades turn into long-term bags. A spot stop loss isn’t about leverage risk — it’s about opportunity cost and capital protection. Capital stuck in a failing position can’t be redeployed into stronger setups. Professional traders treat spot and leverage the same in one respect: Every trade has an invalidation level. If price reaches that level, the idea is wrong — regardless of leverage.
Manual Stops vs Automatic Stops. (Spot Reality)
Most spot platforms don’t offer a simple “stop loss” button. Instead, professionals use: Manual stop levels Pre-planned partial exits Emergency stop-market orders Why manual? Because spot markets: Wick more Hunt obvious levels Require structure-based decisions, not tight mechanical stops Manual stops give you: Flexibility Better fills Control over how much risk comes off at each level
How to Decide WHERE a Spot Stop Loss Goes
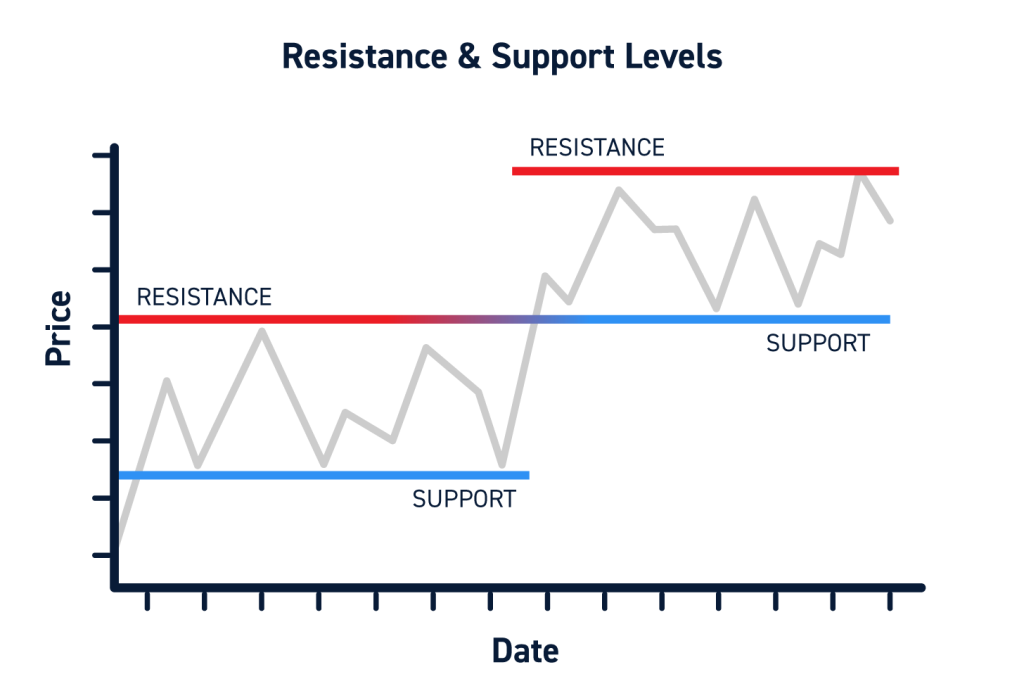
This is the most important part. A stop loss should not be: A random percentage An EMA line A round number “Where it feels uncomfortable” A proper spot stop sits at invalidation. Ask one question: “If price trades here, is my original idea still valid?” If the answer is no, that’s your stop. For swing spot trades, common invalidation zones are: Loss of a higher low Break of a range low Loss of a trend channel Below that level, you’re no longer managing risk — you’re hoping.
Why You Should DCA OUT (Not All at Once)
Spot traders often ask: “Should I sell everything if support breaks?” Professionals rarely do. Instead, they DCA out — but with structure. Why? Reduces emotional decision-making Lowers slippage Keeps you objective if price reclaims But the order of selling matters.
Correct Way to DCA Out: Larger First, Smaller Later
This is where most traders get it wrong.
❌ Common mistake:
Sell small at first
Sell big after price collapses
This leaves maximum exposure at maximum risk.
✅ Professional approach:
Sell MORE earlier, LESS later
Because:
Risk increases as structure weakens
Probability worsens non-linearly
Capital protection comes first
Example DCA-out structure:
First support break: sell 40–50%
Structure failure: sell 25–30%
Trend invalidation: sell remainder
You are selling risk, not price.
How to Combine Manual DCA + Emergency Stops

The cleanest spot setup uses both: Manual partial exits at key levels One final stop-market order as protection if price drops fast This protects you: When you’re offline During high volatility From emotional hesitation Think of the final stop as: Your seatbelt, not your steering wheel.
A Simple Spot Risk Checklist (Save This)
Before entering or managing any spot trade:
✅ Where is my invalidation?
✅ What level removes MOST risk first?
✅ How much am I selling at each level?
✅ Do I have an emergency stop?
❌ Am I holding size because of hope?
If you can’t answer these clearly, you don’t have a plan — you have exposure.
Final Thoughts: Risk First, Always
Spot trading feels safer than leverage. That’s exactly why unmanaged spot positions do the most damage over time. Professional traders don’t survive because they predict better — they survive because they exit better. Trading isn’t about being right. It’s about staying solvent long enough to matter.